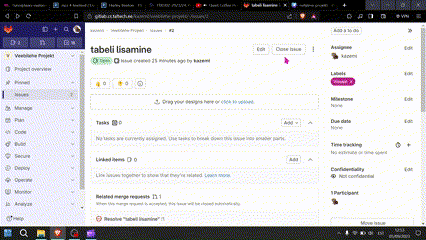
Ticket
To effectively track your work and complete tasks, it's useful to use "issues" or tickets. An issue allows you to track tasks, monitor time spent on the task, and communicate with team members.
Creation
To create a ticket, select "Plan" from the menu -> "Issues" -> "New issue". Then choose a meaningful name for it. You can also add a description. Press "Assign to me" to indicate that you're working on it. Finally, select "Create issue".
Adding Tags
To make it easier to organize tickets, you can use labels. First, select the ticket you want to label, then search for "Labels" in the menu. Click "Edit" -> "Create project label". Give it a name, choose a color, and finally, click "Create".

Closing
Once you've completed a ticket, be sure to close it. To do this, select the ticket you want to close, and then click "Close issue".